Yes, you can make excellent tempeh at home. It’s more practical and affordable than you might think, and you get to control the final flavor. We began making it ourselves after noticing how much better fresh tempeh tastes. The store-bought kind can sit for weeks, but homemade tempeh has a firmer bite, a clean nutty smell, and it absorbs sauces perfectly.
The process hinges on a specific culture, Rhizopus oligosporus, which transforms cooked beans into a solid cake in about two days. Research from Harvard’s public health school suggests fermented soy can be good for your gut, too. For a straightforward guide on starter, temperature, and setup, read on.
Tempeh Fermentation Fast Facts for Home Makers
- Homemade Tempeh Needs Warmth, Airflow, Dry Beans
- Tempeh Ferments Best in 36-48 Hours
- Organic Soybeans Improve Tempeh Flavor & Texture
Quick Reads: What You Need Before Making Tempeh
Tempeh is simple. You need cooked soybeans, starter culture, a warm spot, airflow, and beans that aren’t damp. We learned this through trial and error in our own kitchen.
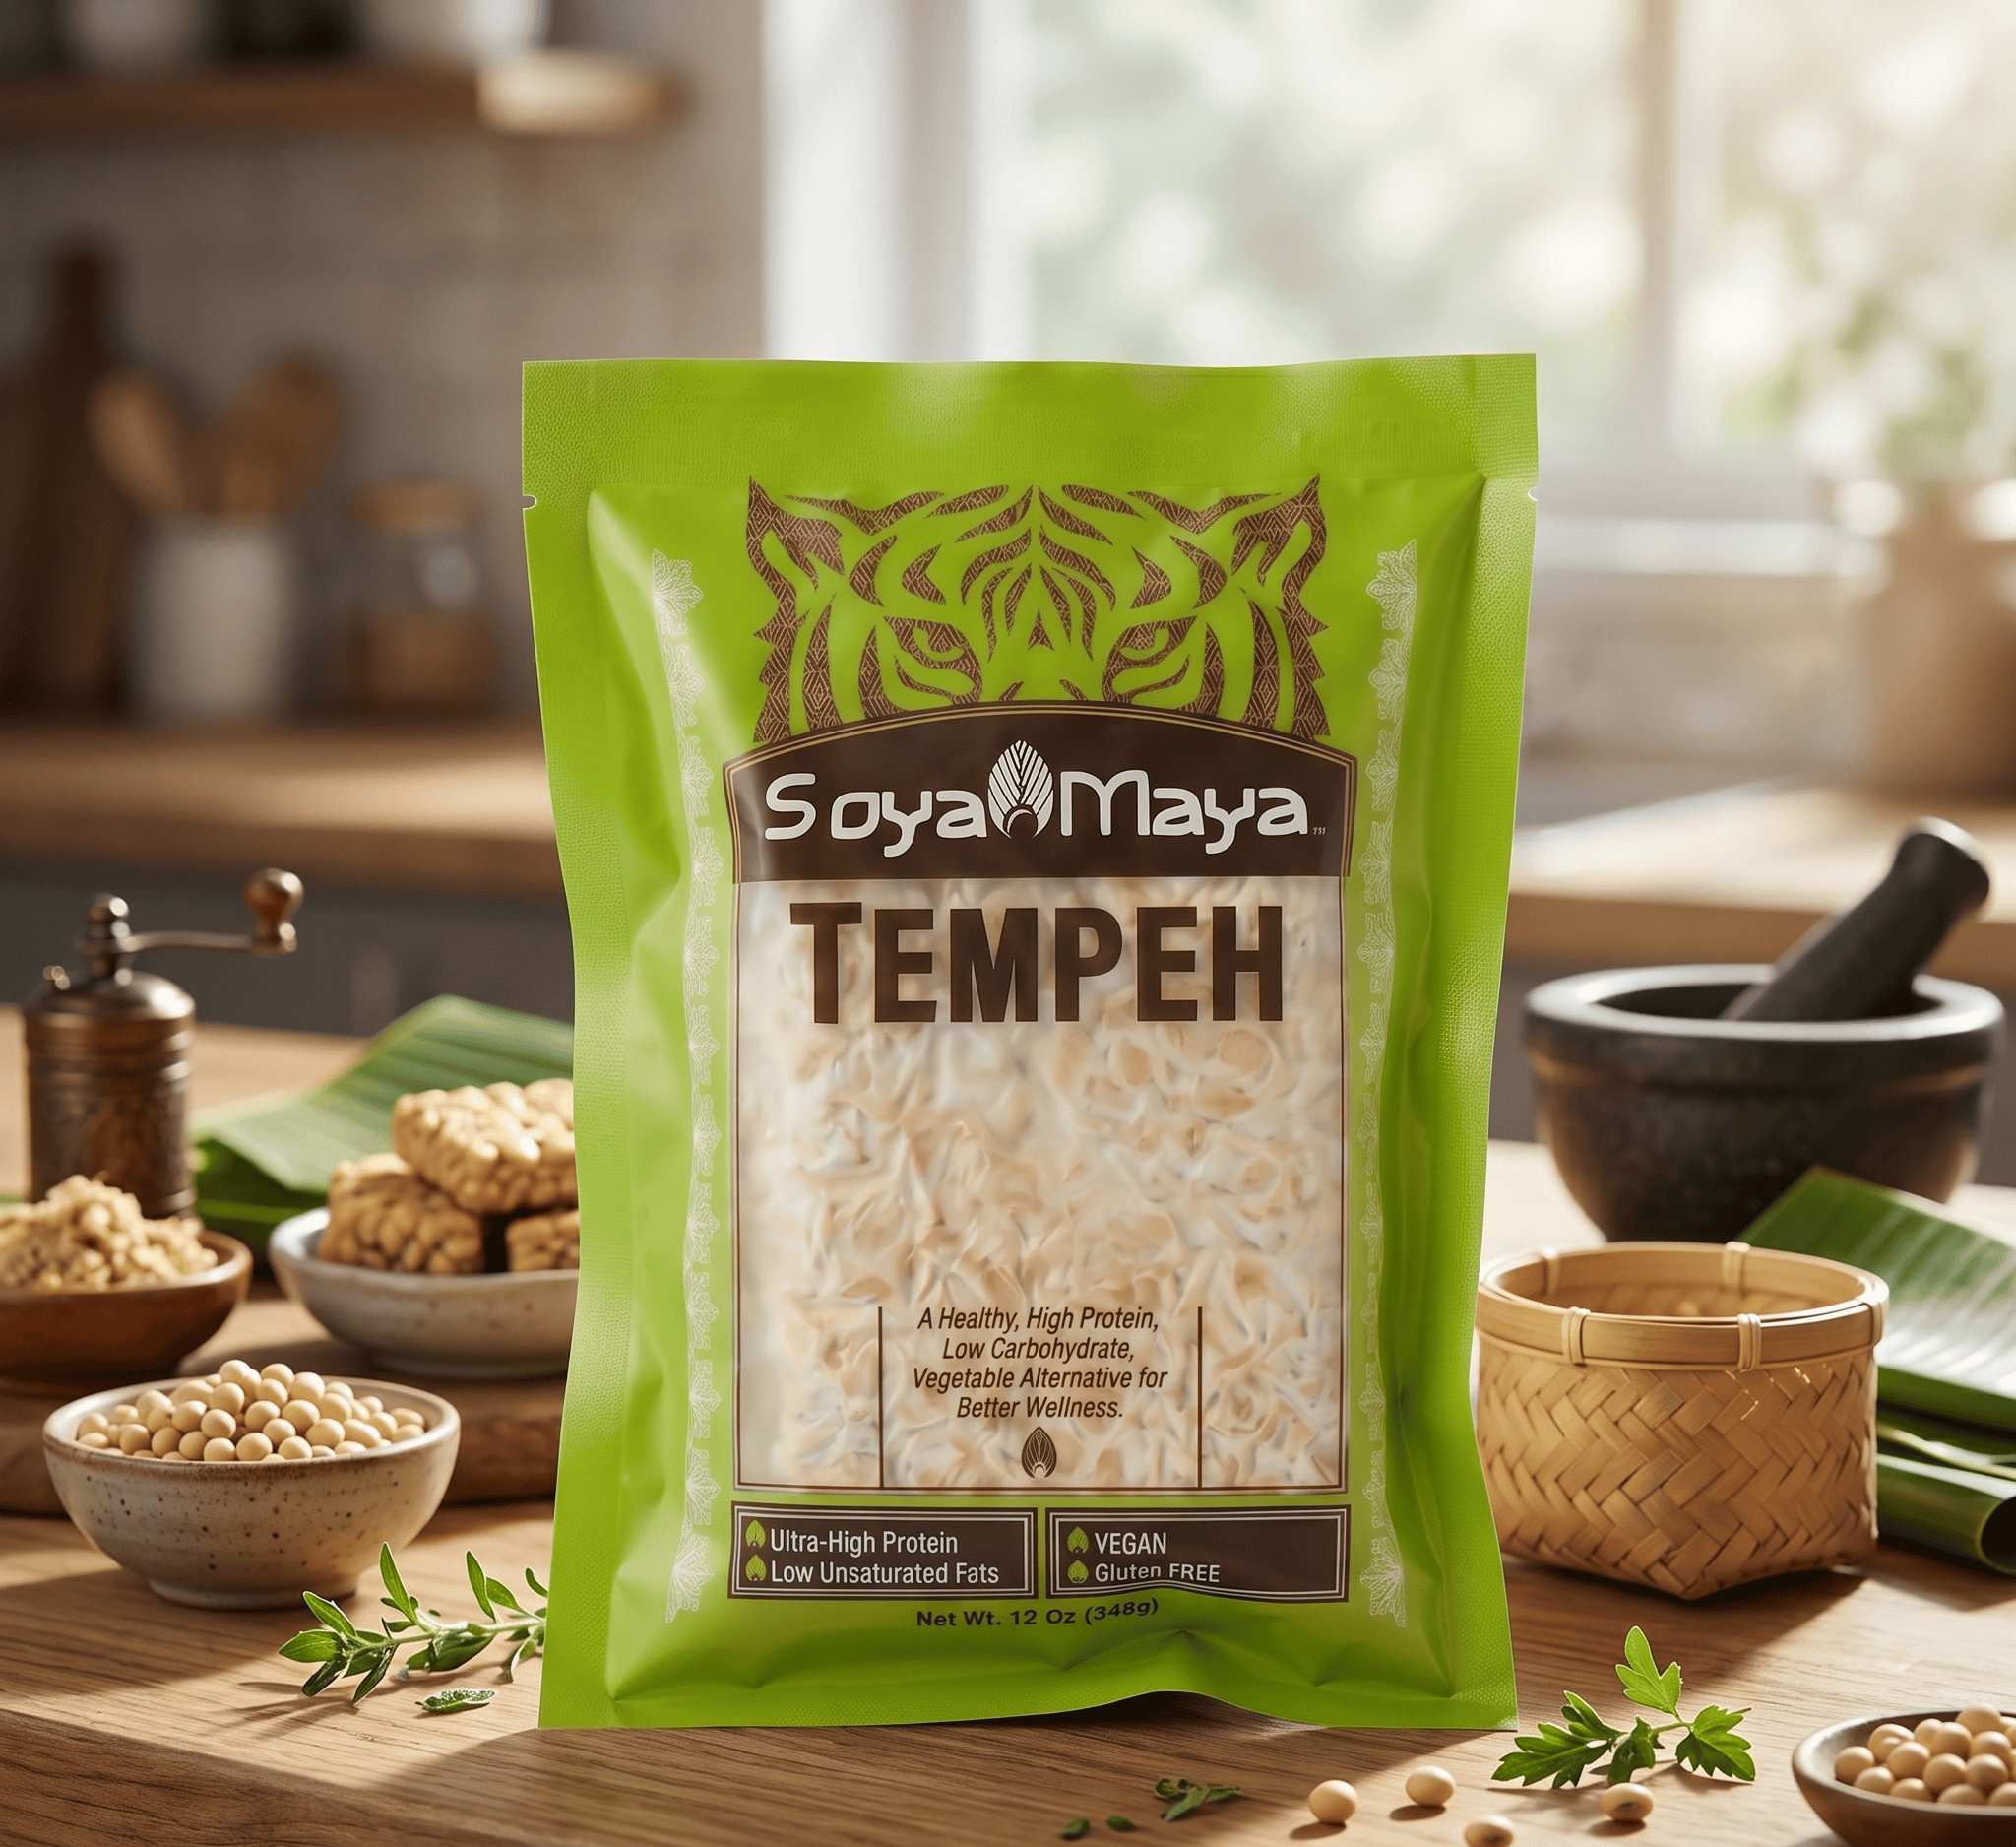
Soya Maya Fresh Tempeh is made the traditional way — no preservatives, no shortcuts. Delivered to your door.
Order Fresh Tempeh →Our first batch failed. The beans looked dry to us, but they still had just enough surface moisture to cause trouble.
The next time, we dried them longer in the pot after cooking, letting the steam evaporate completely, and that batch came out perfectly. It was dense, firm, and clean, without any off-colors.
What You’ll Need for a Starter Batch
If you’re new to this, here’s what we use for a basic, manageable batch. Starting small lets you see how the fermentation reacts to temperature shifts, which makes fixing problems much easier.
- 2 cups of dried soybeans
- ¾ teaspoon of tempeh starter
- Vinegar (for adjusting the acidity)
- A breathable container or perforated bag
- A warm incubation space kept between 30-32°C (86-90°F)
- A thermometer to monitor that temperature
- Clean kitchen towels and sanitized tools
Why Moisture Control is Critical
The biggest hurdle isn’t the starter or the heat. It’s getting the beans truly dry before you inoculate them. Even a faint sheen of water on the beans can give unwanted molds a head start over the tempeh culture. We dry ours in the cooking pot over low heat, stirring frequently, until they feel completely dry to the touch and no steam rises.
Setting Up Your Incubation
Finding that steady warm spot is key. We’ve used everything from a dedicated fermentation box to a simple setup with a heating pad and a cardboard box.
The thermometer is your best friend here; a few degrees too cool slows everything down, a few degrees too warm can overheat the core. The beans need to breathe, so don’t wrap your container too tightly, the perforations in a bag or the gaps in a container lid are what allow the culture to thrive.
Ingredients and Equipment Needed for
You don’t need much. Good tempeh comes from a handful of basic items: soybeans, vinegar, starter culture, something breathable to hold it, and a warm spot. We’ve found that the technique is far more important than any special gear.
We’ve made solid batches using ordinary kitchen pots, reusable containers we already had, and even banana leaves picked up from a local market.
The one thing you can’t skip is the starter culture. It contains the specific mold, Rhizopus oligosporus culture, that actually makes tempeh.
Food & Wine pointed out that how you spread the starter and how much air gets to the beans are the two biggest factors for getting that white mold to grow properly and form a firm block.
Our Typical Setup for One Block
For a standard homemade batch, we gather:
- 2 cups dried soybeans
- ¾ teaspoon tempeh starter mold
- 2-4 tablespoons of vinegar
- Filtered water
- Banana leaves or perforated plastic bags
- A large pot and a colander
- A thermometer
- A warm incubation setup (like an oven with the light on, or a box with a heating pad)
Choosing Your Container
What you pack the beans into changes the final product a bit. We’ve tried a few ways.
- Perforated bags are the easiest for beginners. Airflow is built-in, but plastic can sometimes trap condensation inside if your beans are too damp.
- Banana leaves are our personal favorite when we can get them. They give the tempeh a subtle, earthy smell we really like, and they let air through naturally. The finished block often has a stronger fermented character compared to ones made in plastic.
- A glass dish method is great if you want to avoid plastic. It’s reusable, but you have to watch the humidity closely because airflow isn’t as straightforward.
In our experience, the container choice is less about right or wrong and more about what result you’re after. We still lean toward banana leaves for that traditional touch.
Step-by-Step Guide to Making Tempeh
Tempeh happens when you soak beans, cook them, mix in a starter, and let it sit until white mold grows all over the beans. It looks tricky, but after a couple tries it’s easy. Our good batches all use the same steps, we just watch the heat a bit more on some days.
As highlighted by Comprehensive Reviews in Food Science and Food Safety
“sufficient evidence exists in the literature supporting tempeh fermentation as a low-cost, health-promoting, and sustainable food processing technology to produce protein-rich foods using various beans, legumes, and grains” – Comprehensive Reviews in Food Science and Food Safety
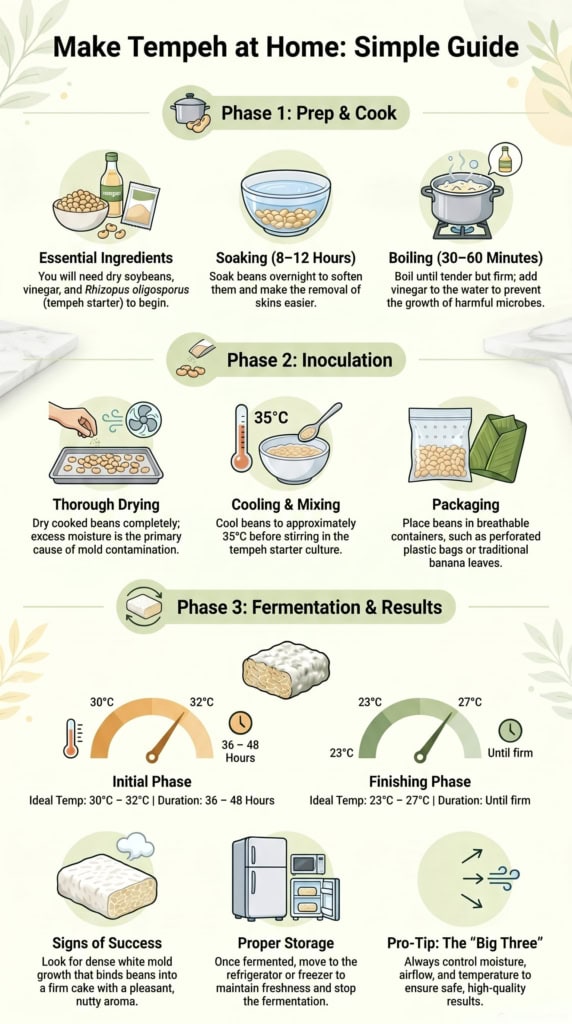
Soaking the Beans
We rinse the beans and put them in water for 8 to 12 hours, usually overnight. This makes them soft and helps the skins come off.
After soaking, we rub the beans between our hands. A lot of the thin skins slide off. Taking off the skins lets air get through the beans later, and the finished tempeh block looks better.
Cooking the Beans
We drain the beans and boil them until they’re soft but not falling apart. This takes 30 to 60 minutes, depending on the beans.
We add apple cider vinegar near the end. A little bit of acid helps the good mold grow and stops bad bacteria. A site called Cultures for Health says lower pH keeps other microbes away.
Once cooked, the beans have to be really dry. We spread them out in the pot and let all the steam go away. If the beans are wet, the batch will probably fail or be crumbly.
Cooling and Adding the Starter
Let the beans cool down to about 35°C (95°F) before adding the starter. We killed a batch once by putting the starter in while the beans were hot, the mold spores died and nothing happened.
Sprinkle the Rhizopus starter over the beans and mix it all up. Every bean needs a tiny bit on it.
Putting the Beans in a Container
Move the beans into something breathable. We’ve used:
- Plastic bags with holes
- Banana leaves
- Glass dishes
- Metal trays with cloth covers
Keep the beans about 1 to 2 inches thick. A thicker pile gets too hot and wet too fast.
Letting it Ferment
Put the beans in a warm place, around 30-32°C (86-90°F), for the first 12 hours.
We usually use:
- An oven with just the light on
- A plant heating pad
- A cardboard box with a towel
- A warm shelf in the pantry
When the mold starts growing, the beans make their own heat. Then we move it to a cooler spot, around 23-27°C (73-80°F).
Waiting for it to Finish
Our tempeh is usually done in 36 to 48 hours.
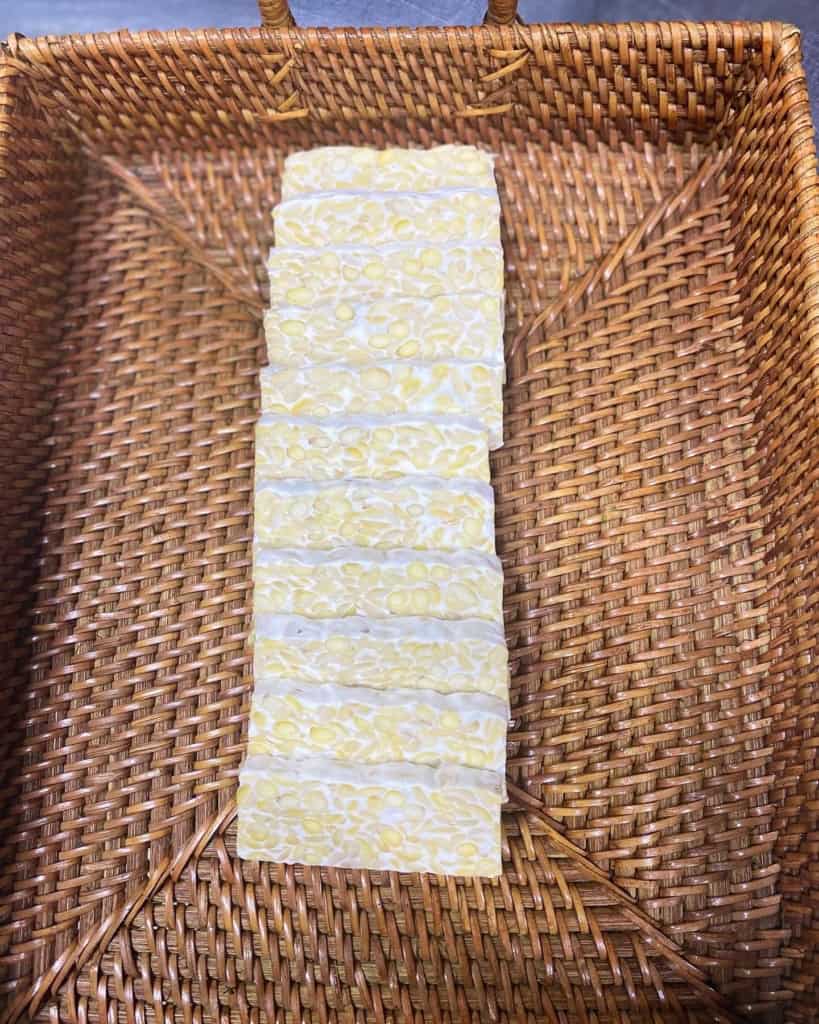
The finished block feels hard and solid, covered in white mold. It smells like nuts or mushrooms, not sour or bad.
Fresh tempeh cooks better than store-bought. It’s tighter, so it doesn’t fall apart and takes on flavors better.
Ideal Soaking and Cooking Time for Soybeans
Soybeans need an overnight soak and a cook until they’re soft, but not falling apart.
We soak ours for about 8 to 12 hours, just on the counter. If we soak them longer, especially when the kitchen is warm, they get too squishy.
After we drain them, we boil them for 30 to 60 minutes. Bigger beans or older beans take longer.
We toss in some apple cider vinegar right before we stop cooking. It makes things a little sour, which helps keep the fermentation safe. The National Center for Home Food Preservation says a sour environment stops bad germs from growing in fermented stuff.
The beans should be tender, but still have a shape. If you cook them until they’re mush, they’ll smash when you stir in the starter, and the mold won’t grow evenly.
Best Methods for Fermenting Tempeh at Home
The trick to good tempeh and stable tempeh fermentation? Keep it warm, let it breathe, and start with dry beans.
We used to think more starter culture was the answer. It wasn’t. What made our tempeh way better was just keeping the temperature steady.
Research from Ultrasonics Sonochemistry shows
“tempeh fermented at 36 °C showed significantly higher levels of beneficial phenolic compounds, flavonoids, and antioxidant capacity” – Ultrasonics Sonochemistry
Here’s exactly what we do now to make it work every time.
Getting the Heat Right
Getting the heat right is a two-step thing.
- First, get it cozy. For the first day or so, we keep it between 30 and 32°C (86-90°F). A cheap seedling mat from the garden store is perfect for this. It just sits under the tray.
- Then, cool it down a bit. Once we see a good white fuzz starting, we move it to a cooler spot, around 23-27°C (73-80°F). If it stays too hot, the mycelium gets weak.
Letting It Breathe & Dry Prep
The mold needs air. Moisture is its enemy.
- Airflow is key. We always use bags with tiny holes poked in them. Never, ever seal it in a tight container. That just traps wet air and makes weird, slimy spots.
- Beans must be bone-dry. After boiling the beans, we spread them thin on a baking sheet and fan them dry. If they feel even a little damp, we wait. Wet beans ruin everything.
- Don’t crowd them. We leave space between bags if we’re doing more than one. Stacking them smothers the fermentation.
We check the temperature with a probe thermometer. Guessing doesn’t work. And we don’t rush it. Good tempeh takes its time, trying to speed it up just makes a mess.
Signs of Properly Finished Tempeh

You know you’ve got good tempeh when it’s a solid white block that smells like nuts or mushrooms.
The first time we nailed it, we sliced one open and saw the difference. The inside was totally solid, like a dense white web had glued every bean together. If you see loose beans falling out, that means the fermentation didn’t finish.
Here’s what we look for in a successful batch.
When it’s done right, homemade tempeh has a few clear features. We check all of these before we call it a win.
- It’s white and compact. The mold growth should be thick and even, covering everything.
- The texture is firm. It shouldn’t crumble when you handle it. It holds together in a solid cake.
- It smells mild. A light, nutty or slightly mushroomy smell is perfect. It shouldn’t smell strong or weird.
- The surface is dry. The outside of the block should feel dry, not damp or slimy.
Sometimes, it doesn’t work out. Here are the clear signs we’ve learned to toss a batch.
- Wrong colors. Any pink, green, or black mold spots mean it’s spoiled.
- Slimy feeling. If it feels slick or gooey, that’s bad bacteria.
- Bad smell. A sharp, chemical, or ammonia-like stink is a sure sign it’s off.
- Too wet. If there’s visible moisture pooling or the block feels soggy, it’s probably contaminated.
Fresh tempeh from our kitchen lasts about a week in the fridge. For bigger weekend batches, we freeze the extra blocks. They keep for months that way, and we just thaw them for stews or stir-fries later.
Common Reasons Homemade Tempeh Fails
Most failed batches happen for four main reasons. The beans are too wet, the starter is weak, the beans can’t breathe, or the temperature keeps changing.
Honestly, moisture is almost always the problem. You can pat the beans dry and think they’re ready, but steam is still hiding inside. When that steam turns to water in your warm incubator, the mold can’t grow right.
If you’re just starting, our advice is simple: get one method working perfectly before you try anything fancy. A cheap, steady setup will make better tempeh than an expensive, inconsistent one. Here’s what usually goes wrong and how we fix it:
| Problem | Likely Cause | Simple Fix |
| Beans fall apart | Beans were too wet | Dry beans longer before adding starter |
| Little or no white mold | Weak starter or low temperature | Use fresh starter and stable warmth |
| Sour or unpleasant smell | Contamination from dirty equipment | Sanitize tools and discard bad batches |
| Uneven white mold growth | Poor airflow | Add more air holes to the container |
| Tempeh overheats in the center | Beans packed too thick | Keep layer under 1.5 inches thick |
| Slimy or wet surface | Excess moisture trapped inside | Improve airflow and reduce humidity |
Good tempeh is usually ready in two days. If you let it go longer, it can start to smell sharp, like ammonia.
Our biggest mistake early on? We kept opening the incubator to look. Don’t do that. Every peek lets the heat and moisture out, and the whole process slows down. Set your temperature, leave it alone, and trust the process.
Local Soybeans and Non-GMO Standards in the U.S.
Let’s talk about soybeans. If you’re buying regular soybeans in the U.S., there’s a good chance they’re genetically modified. The industry numbers show that over 90% of what’s grown here is GMO.
The standard grain supply isn’t separated out, so unless a bag is specifically labeled otherwise, that’s likely what you’re getting.
We learned this the hard way when we first started. The beans we got from a general farm store worked, but the tempeh often had a slightly bitter aftertaste and the texture could be a bit crumbly.
When we switched to beans labeled for human consumption, what they call “food-grade”, the whole process got cleaner. The fermentation was more reliable, and the final product just tasted better.
If you want to avoid GMOs for your homemade batches, you need to look for specific labels. It’s the only way to be sure.
Finding non-GMO soybeans
- Look for the USDA Organic seal. This is your most straightforward guarantee. Organic certification doesn’t allow GMOs.
- Check for the Non-GMO Project butterfly. This is a third-party verification you’ll see on many packaged foods.
- Find “identity-preserved” or “food-grade” suppliers. These beans are kept separate from the main commodity stream from the field to the bag. We get ours from a supplier that works with a co-op of small farms in the Midwest.
- Buy from companies that sell specifically for tempeh or tofu. They’ve already done the sourcing work for you.
That last point is key for us. We order from a supplier that deals in identity-preserved beans. It means we can trace our soybeans back to a specific group of farms. It costs a bit more, but for small-batch makers, the consistency is worth it.
You really can taste the difference, especially in tempeh. Since the fermentation is relatively short, the original flavor of the bean comes through. A cleaner, non-GMO soybean gives you a fresher, nuttier final product without those off-notes we used to get.
Choosing Organic or Non-GMO Soybeans
We prefer organic or non-GMO soybeans for our own tempeh, and it seems a lot of home cooks do too. The reasons usually come down to taste, knowing exactly where your food comes from, and if you’re selling it, having a cleaner label.
We ran a side-by-side test with three types: regular commodity beans, certified organic beans, and identity-preserved food-grade beans. All of them worked, they grew the white mycelium. But the organic and food-grade batches were noticeably different.
They smelled fresher, almost nutty, while fermenting. The texture was also a bit tighter and less crumbly when we cut into the finished cake.
Here’s the thing: in the U.S., finding those non-GMO beans takes some looking. Only a tiny slice of farmland, maybe 5%, grows them.
Most of that comes from special programs in the Midwest where farmers keep these soybeans completely separate from the conventional harvest, all the way from the field to the bag.
So why go through the trouble for a home project? Based on our tests, here’s what we found:
Why non-GMO or organic beans can be worth it
- You know what you’re getting. The supply chain is shorter and clearer.
- The beans are more uniform. They’re sorted for human consumption, so you get fewer broken bits or odd-sized beans, which helps fermentation spread evenly.
- The flavor is cleaner. You get more of a pure, nutty soybean taste without any bitter or “off” notes.
- It matters if you sell it. For a small food business, this is big. Customers who seek out tempeh often check the label closely. Saying your product is made from certified organic or identity-preserved soybeans builds trust right away. We’ve seen it directly affect what people choose to buy.
For us, the choice came down to consistency and quality. The flavor difference was clear enough in a blind taste test that we decided to stick with the organic, food-grade supply for good.
Turning Homemade Tempeh Into a Small Business
Yes, you can run a small tempeh business from a home kitchen. We know people who started by selling to friends on weekends, then grew from there.
The biggest challenge isn’t making a huge amount, it’s making sure every batch turns out good, no mistakes.
We think small-batch is the way to go at first. Get really good at making one perfect batch before you try to make ten. If you jump to bigger equipment too fast, you’ll probably mess up and waste a lot of beans.
Here’s what you actually need to start selling your tempeh.
Getting set up to sell
- A written HACCP plan or Food Safety Plan approved by your local health department. You can’t sell food you make at home unless it’s in a licensed kitchen. We rented space in a commercial kitchen that was already inspected and approved.
- A way to track temperature. We use a simple thermometer and write down the temperature inside our incubator every few hours. This helps us figure out what went wrong if a batch fails.
- A cleaning routine you never skip. We wash and sanitize every pot, tray, and tool the same way every time. We even have a checklist so we don’t forget a step.
- Beans from one trusted supplier. We buy all our beans from the same place. It keeps the flavor consistent, and we know exactly where they came from.
- Labels for your batches. We put a sticker on each batch with the date we made it. This is important for tracking, and it’s the law if you’re selling food.
- A really good refrigerator. A regular home fridge isn’t strong enough. You need a commercial fridge that gets cold enough to stop the fermentation completely and keep the tempeh fresh.
- A backup supply of starter culture. We order a few packs at a time and keep the extras in the freezer. You don’t want to be ready to make a batch and realize you’re out of starter.
The rules get stricter once you start selling. Health inspectors will want to see your temperature logs and cleaning schedules. You have to prove you’re in control of your process.
There are customers who want what small makers offer. Many successful sellers don’t try to make the cheapest tempeh. They make tempeh that’s different and special.
Types of tempeh people are buying
- Tempeh made from black beans or chickpeas.
- Tempeh made from split peas.
- Tempeh is made with 100% organic soybeans.
- Tempeh wrapped in banana leaves, the old-school way.
People shopping for vegan protein often look for foods that are fermented and simple. They like buying from a small business where they know the story. They’ll pay more for a product that tastes great and comes from someone who cares.
FAQ
How Do You Start Making Tempeh at Home?
To learn how to make tempeh at home, you need cooked soybeans, vinegar, and a tempeh starter culture. The tempeh fermentation process works best when the beans stay dry, warm, and well ventilated.
Many beginners follow an easy tempeh recipe using plastic bags with small air holes or shallow containers. Making tempeh from scratch becomes easier after a few attempts because you learn how moisture and temperature affect fermentation results.
Can You Make Homemade Tempeh Without Special Equipment?
Yes, you can make homemade tempeh without expensive equipment. Many people use an oven light, insulated box, or warm kitchen corner for DIY tempeh fermentation. Homemade tempeh without incubator methods can still produce good results if the temperature remains stable.
Proper tempeh incubation tips include keeping the beans warm, avoiding excess moisture, and allowing airflow. Homemade fermented soybeans usually form a firm white fermented soybean cake within 24 to 48 hours.
Why Does White Mold Grow on Homemade Tempeh?
White mold on tempeh is a normal and necessary part of the tempeh fermentation process. The mold comes from Rhizopus oligosporus found in the tempeh mold starter. During homemade soy fermentation, the white mold spreads around the beans and binds them into solid homemade tempeh blocks.
However, black, green, or slimy patches can indicate contamination. Proper tempeh fermentation temperature, airflow, and clean soybeans for tempeh help support safe tempeh fermentation.
What Beans Can You Use Besides Soybeans for Tempeh?
Soybeans are the traditional choice, but many homemade vegan food recipes use different legumes. Popular alternatives include black bean tempeh recipe variations, chickpea tempeh recipe ideas, and split pea tempeh.
These options still follow the same tempeh making process used in homemade fermented protein recipes. Different beans create different textures and flavors. Many people enjoy experimenting with homemade plant based protein recipes to create healthy fermented foods with unique tastes.
How Should You Store Fresh Homemade Tempeh Properly?
Fresh homemade tempeh should cool completely before storage. You can keep it in the refrigerator for several days using a breathable container or wrapped paper. Learning how to store homemade tempeh correctly helps maintain flavor, texture, and freshness.
Many people freeze homemade organic tempeh for longer storage. Homemade tempeh texture tips include avoiding sealed wet containers because trapped moisture can soften the fermented soybean cake and reduce overall quality.
Homemade Tempeh Gets Easier Once You Find Your Rhythm
Making tempeh at home can feel tricky at first, especially when batches turn out too wet or fail to ferment evenly. Once you understand proper drying, temperature control, and clean preparation, the process becomes much easier and more reliable.
SoyaMaya helps simplify homemade tempeh with quality soybeans and consistent fermentation support that improve texture and results from the beginning. Whether you’re new to fermentation or refining your method, SoyaMaya makes homemade tempeh feel more approachable and dependable every time.
References
- https://pubmed.ncbi.nlm.nih.gov/33569911/
- https://pmc.ncbi.nlm.nih.gov/articles/PMC12882634/
Related Articles
- https://mayasaritempeh.com/what-is-rhizopus-oligosporus-culture/
- https://mayasaritempeh.com/fresh-tempeh/
- https://mayasaritempeh.com/understanding-tempeh-fermentation/
Soya Maya Fresh Tempeh
Traditionally fermented, no preservatives, shipped fresh and frozen to your door. The real deal, direct from us.